
Managing staff schedules for your service-based business can be a headache. Whether you run a salon, a clinic, or a tutoring center, keeping track of who’s working when, who’s booked, and who has free time is a constant challenge.
That’s where WpBookingly Pro comes in. It’s a simple, powerful tool designed to make staff management a cinch so you can say goodbye to double-bookings and hello to a smooth, efficient workflow.
In this guide, we’ll walk you through everything you need to know about using WpBookingly Pro’s staff management feature. You’ll learn how to set up your team, manage their schedules, and optimize your business for success.
Why Staff Management Matters for Your Booking Site
Before we get into the how-to, let’s talk about why staff management is a big deal. Staff management in a booking system means organizing your team’s schedules, assigning them to specific services, and ensuring clients can book the right person at the right time. It’s like having a super-organized assistant who never sleeps. With WpBookingly Pro, you can automate this process, saving time and keeping everyone happy.
Here’s a stat to back it up: According to Fortune Business Insights, the global appointment scheduling software market (which includes staff management tools) is expected to grow from $546.1 million in 2025 to $1,518.4 million by 2032, with a 15.7% CAGR. Why? Because businesses using these tools see 46% of appointments booked online by clients themselves, freeing up staff to focus on delivering services rather than juggling schedules. That’s a game-changer for productivity and customer satisfaction!
Why WpBookingly Pro for Staff Management?
WpBookingly is a WordPress plugin designed to make service booking seamless, and its Pro version unlocks advanced staff management features that the free version doesn’t offer. Unlike the basic version, which focuses on core booking and WooCommerce integration, WpBookingly Pro lets you:
- Assign staff to specific services and manage their availability.
- Let clients choose their preferred team member during booking.
- Sync schedules with Google Calendar to avoid conflicts.
- Track staff performance with detailed reports.
This is perfect for businesses like spas, clinics, or repair shops where multiple staff handle different services. Plus, it’s mobile-friendly and integrates with WooCommerce for smooth payments.
Step-by-Step Guide: Managing Staff with WpBookingly Pro
Ready to get started? Here’s how to manage your staff using WpBookingly Pro.
You’ll need the free Service Booking Manager for WooCommerce plugin installed, plus the Pro version for staff management features. (Grab them at wpbookingly.com or WordPress.org.) Let’s make it super easy!
1. Install and Activate WpBookingly Pro
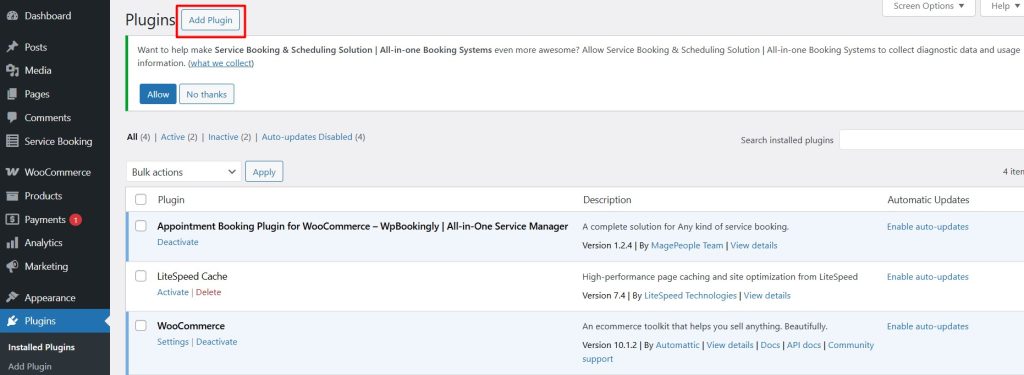
- In your WordPress dashboard, go to Plugins > Add New.
- Search for “Service Booking Manager for WooCommerce” (the free base plugin) and install it.
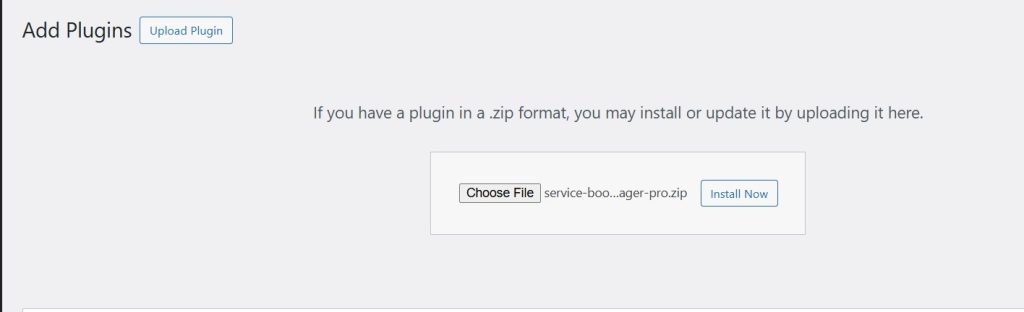
- Purchase and install WpBookingly Pro (check wpbookingly.com for licensing details).
- Activate both plugins, ensuring WooCommerce is also active.
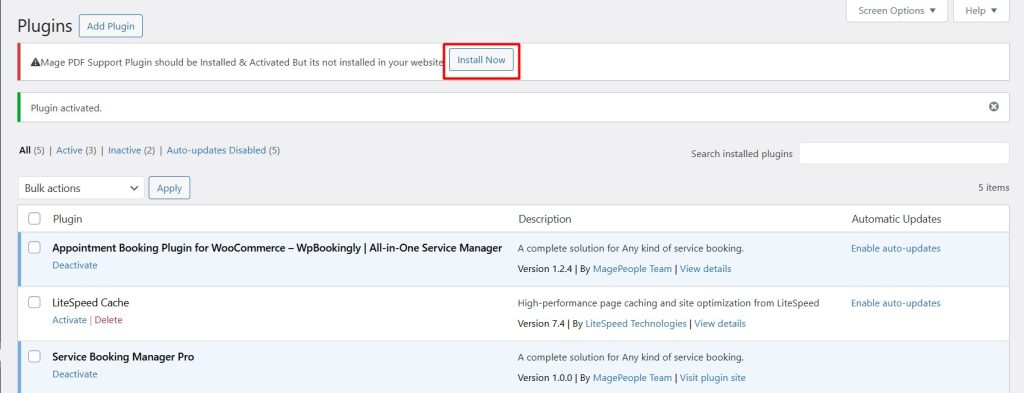
- Install and activate Mage PDF from the prompt
Before adding the staff you can learn to use WpBookingly plugin and create a repair service website.
2. Access the Staff Management Section
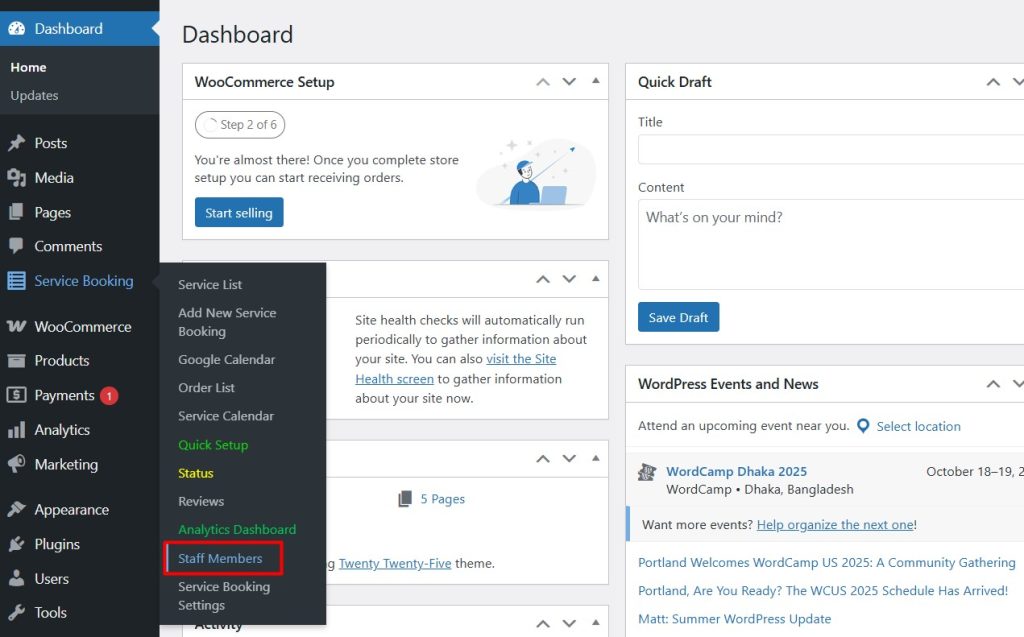
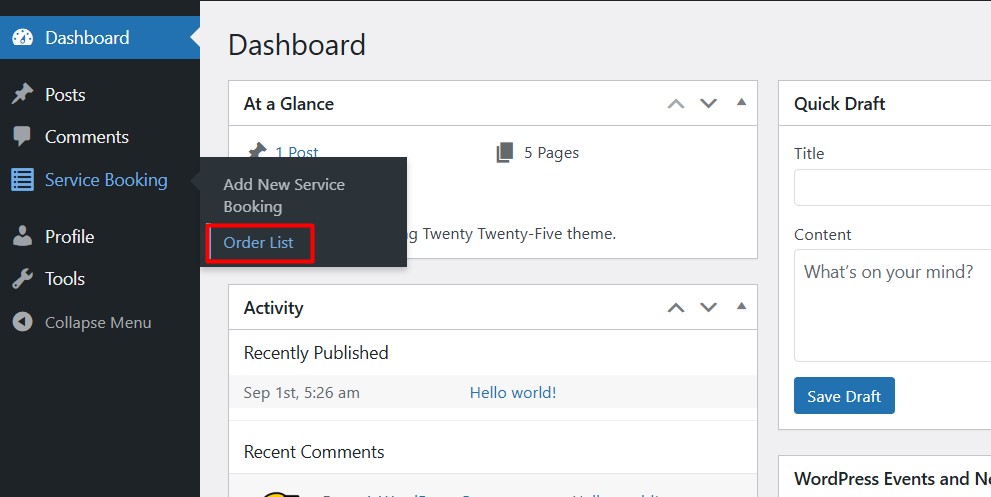
- In your WordPress dashboard, find Service Booking in the sidebar.
- Click Staff Members. This is your hub for managing staff, only available in Pro.
3. Create Your Staff List
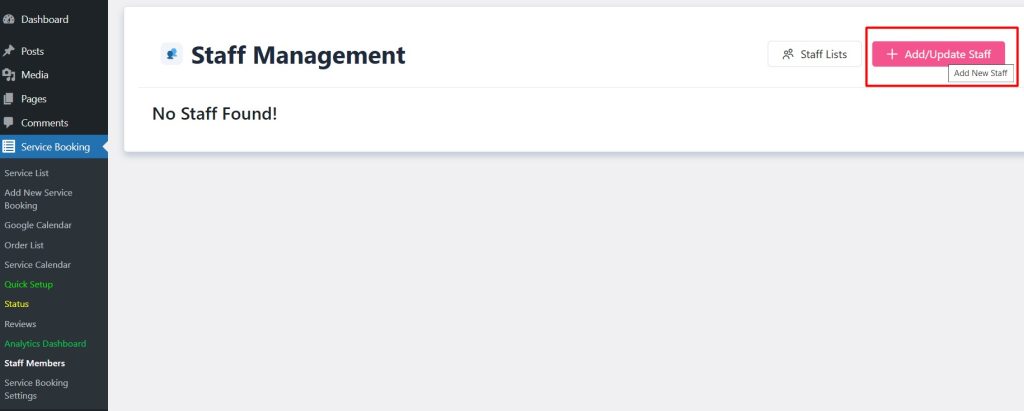
- Click Add New Staff.
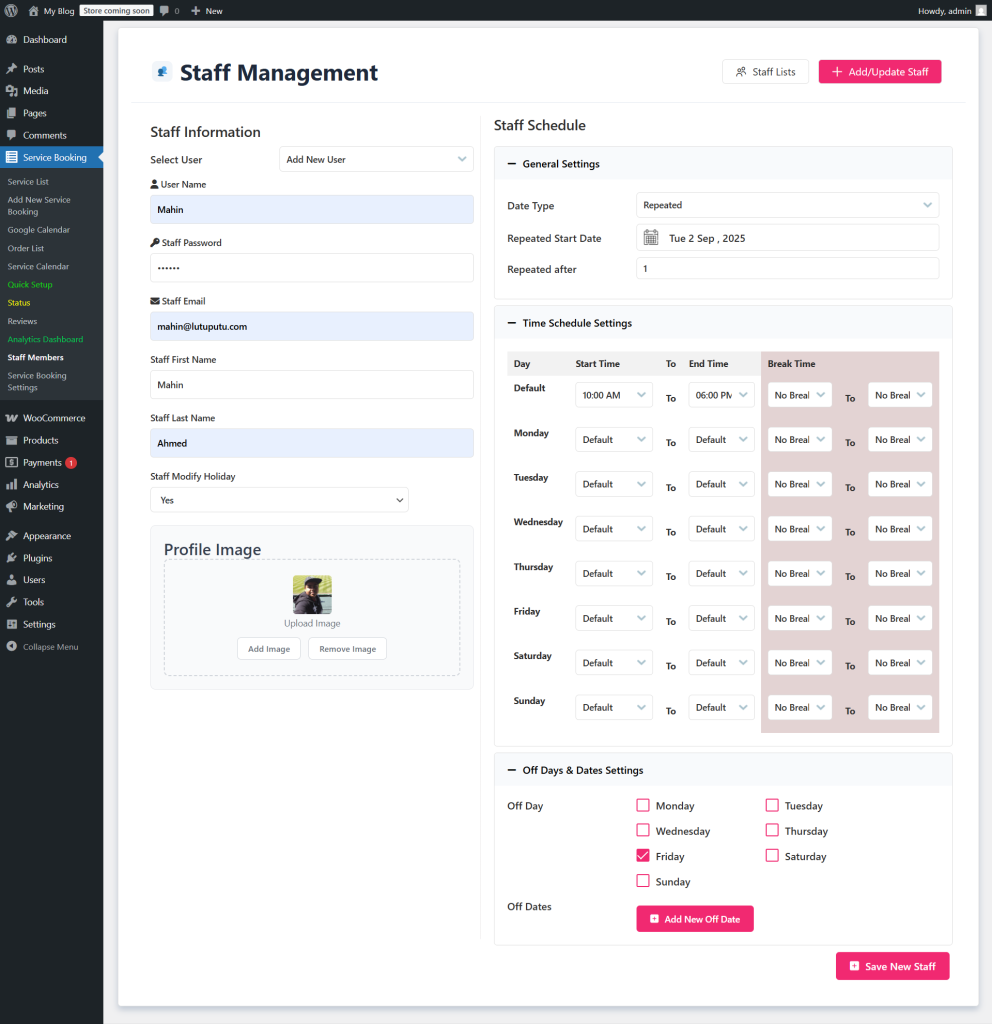
- Enter details like name, email, bio, and a photo (optional but great for client trust).
- Save each profile. You can add unlimited staff members, which is perfect for growing businesses.
4. Assign Staff to Services
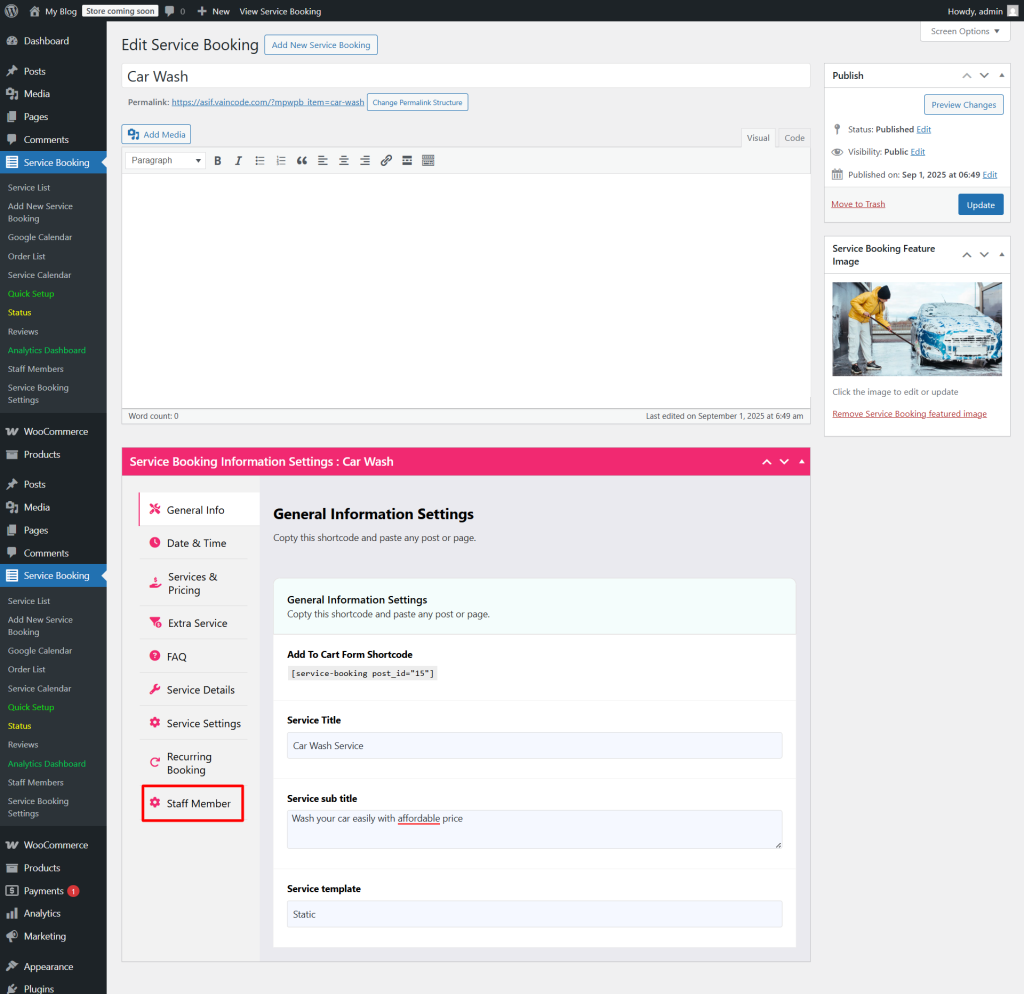
- Go to Booking Plus > Services.
- Edit or create a service (e.g., “Massage” or “Car Wash”).
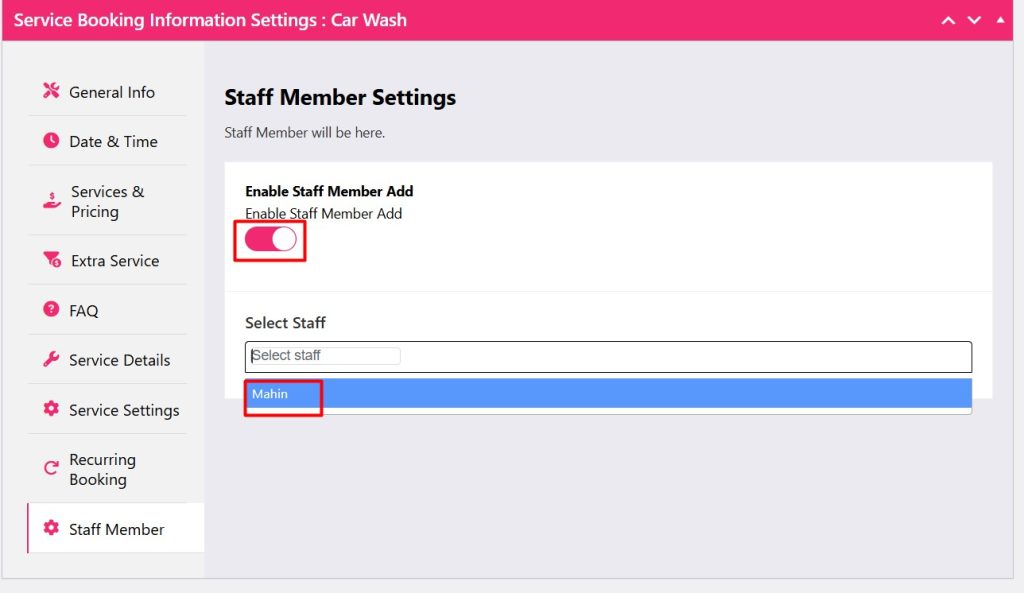
- In the service settings, you’ll see a Staff Assignment dropdown (Pro feature). Select the staff members who can perform this service.
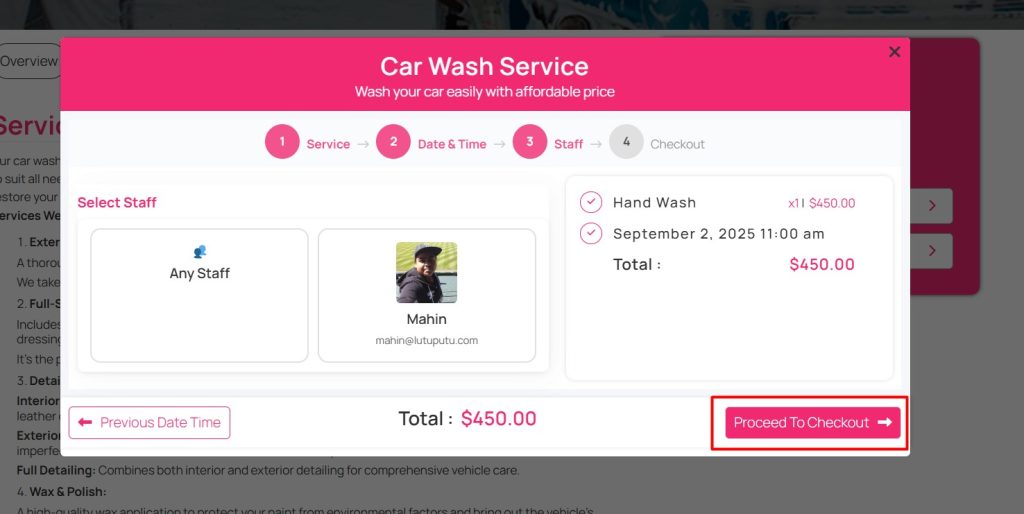
- You can place order and check staff management is working or not
5. Set Schedules and Availability
- Login to Staff dashboard and check the Staff section, edit each staff member’s profile.
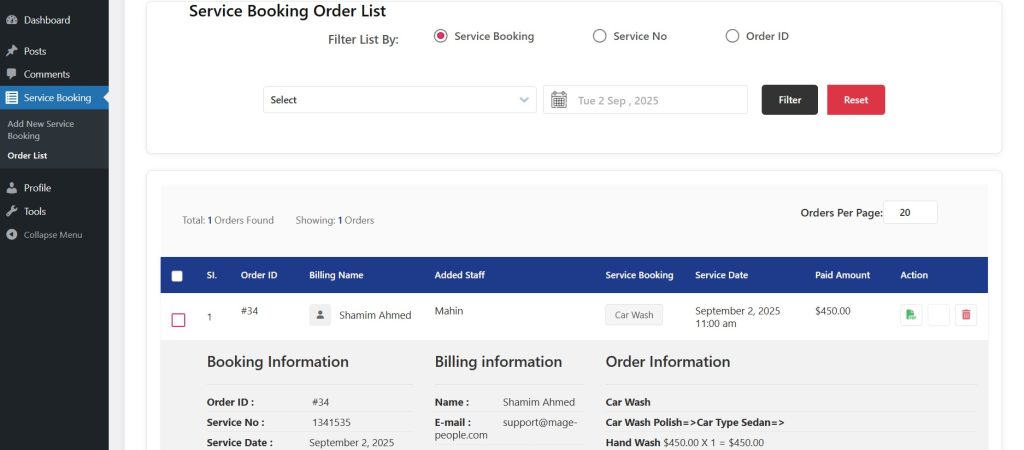
- Staff can check their service order with date and time and the client details.
6. Automate and Track
- Turn on email notifications in Service Booking > Settings to alert staff about new bookings or changes.
- Use the Pro version’s reporting tools to see who’s booked the most or which services are trending.
- Optional: Set up recurring appointments for regular clients (another Pro perk).
That’s it! In about 20-30 minutes, your staff management system is up and running, letting your team focus on what they do best.
How to Automate Staff Management with WpBookingly Pro
Automation is the secret sauce that makes staff management effortless. With WpBookingly Pro, you can:
- Auto-Assign Bookings: Set rules to assign services to staff based on availability or expertise.
- Send Notifications: Automate email for staff and clients, reducing no-shows by up to 30%.
- Sync with Google Calendar: Keep everyone’s schedules aligned, even on the go.
- Use Analytics: Pull reports to see which staff or services are driving revenue, helping you make smart staffing decisions.
Start with notifications, then experiment with calendar syncs. It’s like putting your staff management on autopilot!
FAQs: Your Top Staff Management Questions Answered
Got questions? I’ve got you covered with answers to the most common queries about managing staff in WpBookingly Pro.
What is Staff Management?
Staff management involves organizing your team’s schedules, assignments, and availability to deliver services efficiently. In WpBookingly Pro, it’s about assigning staff to bookings, setting hours, and automating tasks to keep things smooth.
How Do You Automate Staff Management?
With WpBookingly Pro, automate by setting auto-assignment rules, enabling email, and syncing with Calendar. This cuts manual work by up to 50%, letting you focus on growing your business.
How Do I Assign Staff to a Service in Bookings?
In your WordPress dashboard, go to Service Booking > Services, edit a service, and use the Staff Assignment dropdown (Pro feature) to select team members. Save, and clients can choose them when booking.
What is a Booking Management System?
It’s a tool (like WpBookingly) that handles reservations, payments, and schedules in one place. It’s your digital assistant for keeping bookings organized and stress-free.
What is a Booking Staff?
Booking staff are your team members who provide services—like stylists, mechanics, or tutors. In WpBookingly Pro, you manage their profiles and assign them to specific bookings.
How to Find Staff Page in Bookings?
In WpBookingly, go to Service Booking > Staff in your WordPress dashboard. This Pro-only section lets you add, edit, and manage staff profiles.
What is the Difference Between Bookings Team Member and Scheduler?
A team member is the person performing the service (e.g., a dentist). A scheduler is the system or plugin (like WpBookingly Pro) that organizes their bookings and availability.
How to Create a Staff List?
Navigate to Booking Plus > Staff, click Add New Staff, and fill in details like name, email, and photo. Repeat for each team member. In Pro, you can import lists via CSV for faster setup.
Wrapping It Up
Managing your team on a WordPress booking site just got easier.
WpBookingly Pro handles the heavy lifting, letting you assign staff to services, sync calendars, and automate tasks so you can focus on what matters most.
Stop juggling schedules and start growing your business. Get the Pro version at wpbookingly.com now.